Introduction
Before sharing a document, you'll want to make
sure it doesn't include any information you want to keep private. You
may also want to discourage others from editing your file. Fortunately,
Word includes several tools to help inspect and protect your document.
Optional: Download our practice document.
Watch the video below to learn more about finalizing your documents.
Document Inspector
Whenever you create or edit a document, certain personal information may be added to the file automatically—for example, information about the document's author. You can use Document Inspector to remove this type of information before sharing a document with others.
Because some changes may be permanent, it's a good idea to use Save As to create a backup copy of your document before using Document Inspector.
To use Document Inspector:
- Click the File tab to go to Backstage view.
- From the Info pane, click Check for Issues, then select Inspect Document from the drop-down menu.
- Document Inspector will appear. Check or uncheck the boxes, depending on the content you want to review, then click Inspect. In our example, we'll leave everything selected.
- The inspection results will show an exclamation mark for any categories where it found potentially sensitive data, and it will also have a Remove All button for each of these categories. Click Remove All to remove the data.
- When you're done, click Close.


Protecting your document
By default, anyone with access to your document will be able to open, copy, and edit its content unless you protect it. There are several ways to protect a document, depending on your needs.
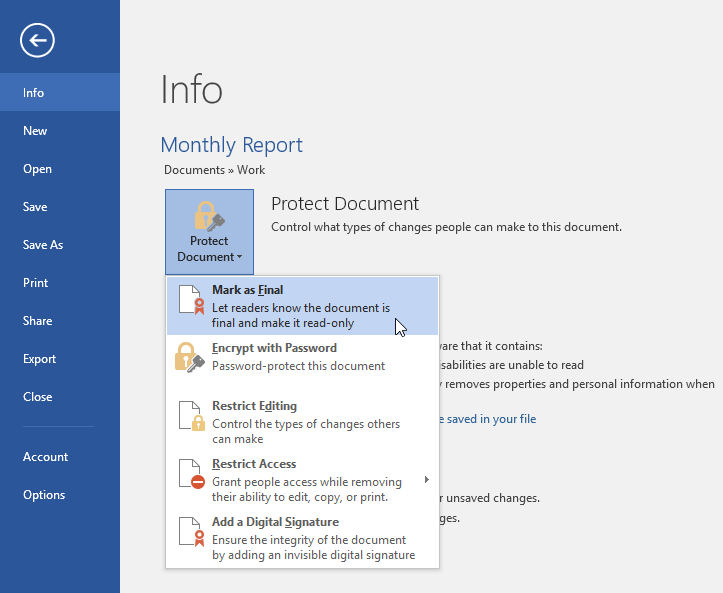
To protect your document:
- Click the File tab to go to Backstage view.
- From the Info pane, click the Protect Document command.
- In the drop-down menu, choose the option that best suits your needs. In our example, we'll select Mark as Final.
Marking your document as final is a good way to discourage others from
editing the file, while other options give you more control if you need
it.
- A dialog box will appear prompting you to save. Click OK.
- Another dialog box will appear. Click OK.
- The document will be marked as final. Whenever others open the file, a bar will appear at the top to discourage them from editing the document.


Marking a document as final will not actually prevent others from editing it because they can just select Edit Anyway. If you want to prevent people from editing the document, you can use the Restrict Access option instead.